The RIFTSTORM Safe House
Your post-tutorial hub for Weaver swaps, loadouts, Forge Center crafts, and mission selection before every deploy.
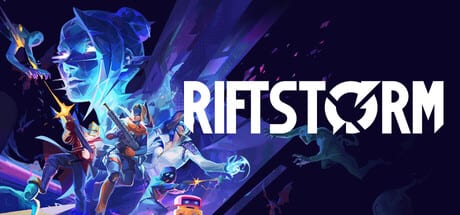
After the onboarding campaign, RIFTSTORM drops you into the Safe House—the always-online hub where Weavers prepare between rift operations. Official player docs describe it as the place you access missions, select other Weavers, and change loadouts before deploying into Mythic Protocol content. This guide maps the Safe House loop so your squad spends less time fumbling menus and more time clearing PADDOCK Contingency objectives before the planned August 11, 2026 Steam Early Access launch.
What the Safe House is for
Treat the Safe House as mission control, not a social lobby substitute. Steam Lobby and invite codes still form your party; the Safe House is where each player configures power:
- Swap among Early Access Weavers: Rook, Starling, Hertz, Botsy, Caracal
- Equip weapons and review Combat Power readiness
- Enter the Forge Center to craft, salvage, and manage blueprints
- Open the mission board for Threat, CP recommendations, and briefing maps
- Adjust controls and settings before queue
Because sessions are always online, finishing Safe House prep before friends are waiting reduces disconnect friction and mid-mission Settings panic.
Recommended prep order
Use this checklist every session:
- Confirm party — Host lobby; friends join via Steam or codes (How to Co-op).
- Pick Weavers — Cover roles with Trio Comps or the Squad Composer.
- Forge pass — Salvage junk, craft or repair, check scarring status on carried weapons.
- Loadout lock — Equip the weapons you will actually risk; stash trophies stay home.
- Mission select — Match Threat Level and recommended CP; read zone notes for Rift Exposure.
- Extract agreement — Voice a greed threshold using the Extraction Checklist.
- Deploy — Enter the operation; mid-run power comes from Lythograms, not Safe House menus.
Loadout table habits
The Safe House loadout screen is where Weapon Scarring risk begins. Only equip pieces you are willing to scar if the extract fails. Keep a mid-tier “learning” set for new Threat tiers and a high-CP “farm” set for known routes. Shared vault ideas from playtests—moving weapons across Weavers—mean one strong craft can support multiple mains, but do not rotate a scarred rifle onto a friend without saying so.
| Loadout slot mindset | Bring when |
|---|---|
| Learning set | New Threat, new Weaver, pug lobbies |
| Farm set | Known PADDOCK route, full trio, clear extract plan |
| Prestige / trophy | Never—leave in vault |
Forge Center from the hub
The Forge Center sits inside Safe House flow even though it has its own deep guide. Quick hub rules:
- Craft random when you need any CP bump.
- Craft from Dataseeds when you know the archetype.
- Salvage duplicates every return trip—stash bloat slows decision making.
- Repair or retire scarred weapons before the next high Threat board pick.
Mission board and briefing
Mission select is still Safe House territory. Briefings preview objectives, recommended CP, Threat, and sometimes exposure hotspots. Spend thirty seconds here as a squad. Solo players should under-tier; full trios can push when Periapt and CP align. Experimental Threat 3+ content at Early Access launch is available but less tightly balanced—treat it as optional from the Safe House board, not required progression.
Periapt and meta menus
Account Periapt progression is hub-side. Spend nodes between missions when you have extracted materials, not while friends are mid-countdown. Coordinate Periapt goals with your static so one player is not stuck unlocking solo-only comfort while the group farms co-op blueprints.
Demo Safe House vs Early Access
The Steam demo (app 3212570) offers a narrower hub slice—level-locked Weavers and simplified crafting. Use demo sessions to practice menu muscle memory. Full Early Access Safe House adds persistent Forge Center economy, broader mission boards, and the complete five-Weaver roster for long-term planning.
Common Safe House mistakes
- Deploying with vault trophies equipped “just for one quick run”
- Ignoring a teammate’s scarred primary until the extract fails
- Changing Weavers after mission select without rechecking CP
- Opening Settings mid-fight because controls were never configured in the hub
- Skipping salvage until the inventory is unreadable
Master the Safe House and every deploy starts cleaner. Pair this page with Getting Started for the full lobby-to-extract loop and Early Access Overview for what the launch hub is expected to include.
Frequently Asked Questions
Quick answers to the most common RIFTSTORM questions.
What is the Safe House in RIFTSTORM?
The Safe House is the post-tutorial hub where you select Weavers, change loadouts, use the Forge Center, and pick missions before deploying online.
Do I form parties inside the Safe House?
Party formation uses Steam Lobby and invite codes. The Safe House is where each player prepares power before or after joining—see How to Co-op.
Can I change Weaver between missions?
Yes. Swap Weavers in the Safe House, then recheck Combat Power and loadout scarring risk before the next deploy.
Where do I craft from the Safe House?
Open the Forge Center from hub flow to craft, salvage, and manage Dataseed blueprints.
Should I configure controls in the Safe House?
Yes. Set keyboard or gamepad presets in Settings before deploy so you are not adjusting inputs mid-fight—see Controls.